Thursday, 23 August 2012

Assignment 2- Evanescent

I am inspired by the building made by SANAA named the Rolex Learning Centre which exhibits its many curvaceous features and sleek lines with the use of a light and simple colour scheme - which has given me a guide as to how I can unpack my digital concept model in a logical manner in regards to my concepts.  


SANAA Rolex Learning Centre, Interior

SANAA Rolex Learning Centre, Exterior


The name to my 'work of art' is evanescent. The ideas for my digital concept is derived from my original concept of simplicity and free-flowingness, following my unpacked and refined ideas which are translucent spacial proportions and fluidity (as described in my week 5 final development post). The main idea of my digital concept model is to showcase a sense of lightness although the materials used may in reality be quite heavy on an object such as the heap of ‘mirrors’ I applied on my rendered digital concept model. To integrate my fluidity idea into my design, I added a series of curved lined sequences at the base of my digital concept model to make it seem like it was almost floating. 

Physical object with my 6 Augmented reality markers:

note: I changed my 6 markers to only 4  because of the time constraints of making the buildAR animations..


2x A3 posters:


As stated in a previous post below, I've used Modo601 to create my 3 rendered images:


Screen shots of final AR object in use:


Screen recording of AR object & 3ds max and buildAR videos:


Assignment Download: 

http://www.mediafire.com/?8994x0rvoocuarw

Monday, 20 August 2012

Week 5- Final Development & independent study

1. I got my final feedback on my developing content for next week. My model seems to be going alright BUT since I have refined my concepts to Translucent Spacial Proportions and Fluidity my model should envelop what my concepts are trying to convey- which is why my second sketched idea was picked because it connects more to my concept with fluidity and Transucent Spacial Proportions. 

We have figured out that the idea of fluidity should be exposed with replacing the tessellated  support on the bottom of the model, but incorporate a mobius band which intertwines with each other to give an effect of an infinite flowing space. Below is the sketch of my developed concept as derived from the feedback recieved this week. 
And from the sketch, I've developed my second draft below on 3ds max.


The animation that I've chosen for the Augmented reality sequence is described below:


2. I have decided to use 5 different software's to take advantage of each of its specific strengths:
3ds Max: I'll be using 3ds max mainly for its easy modelling abilities, to be honest I used to loathe using 3ds max because I thought it was complicated to use but since I've been using it more regularly I've gotten familiarized with its many functions and ease of workflow.
Modo 601: I've used modo 601 for modelling and rendering for my year 12 design and technology major work, I've missed this program greatly- mainly because I'm familiar with its rendering advantages and it's easy to use.
BuildAR: Using buildAR is one of the main parts of this assignment, to show the abilitity of the model to fit in an augmented reality.
Photoshop 5.5:  Photoshop 5.5 for the editing and manipulating of images/rendrings.
Indesign 5.5: Using this program to embed animations/recordings as an interactive pdf.

3. I've imported my 3ds max model into using modo 601 and rendered it but I've encountered problems in modo which is the quality of renders .. I havent had this problem before in the past but here they are:

Blurryness which ive fixed due to the antialiaising ..Also, the materials dont transfer as well as i'd like

In addition, the quality of the pixels aren't as I expected
I've also managed to fix that but the materials aren't up to its highest potential so I'm still working on it.


Independent task- Week 4


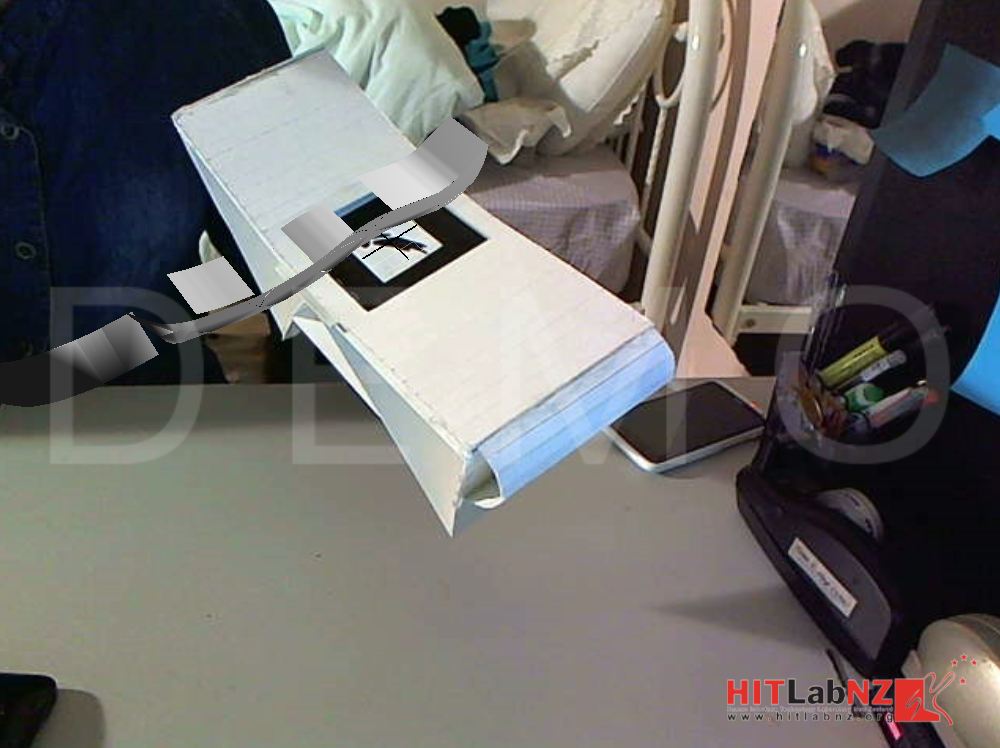
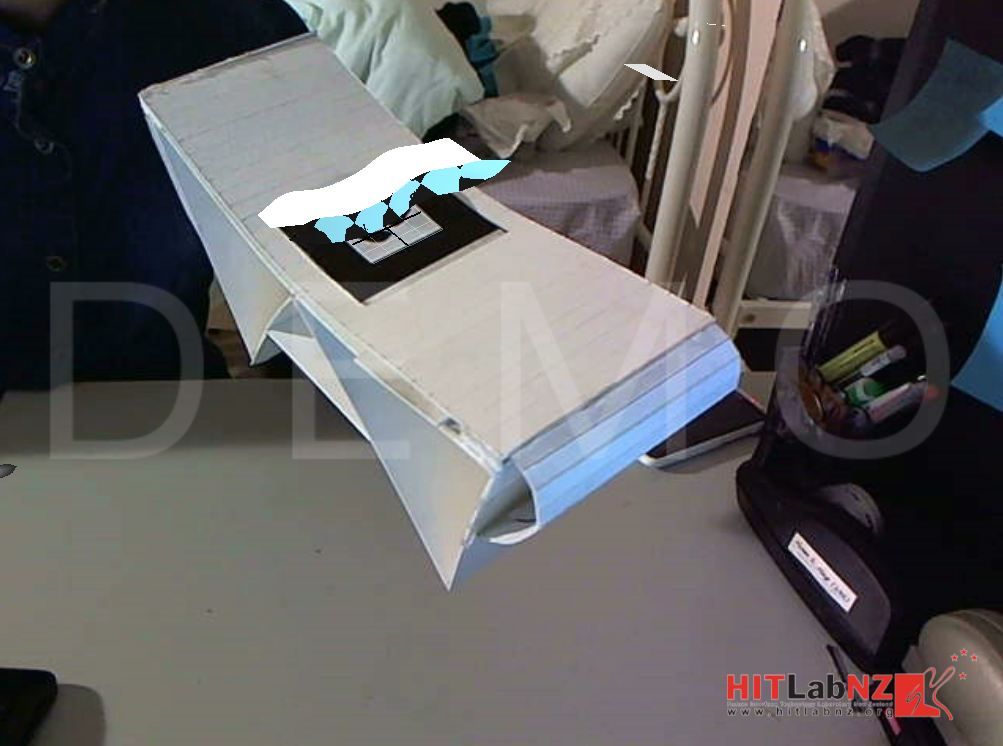
1. I already have cardboard at home so I just tried experimenting with folding half of the model. There are many ways in which i can go about completing this assignment, I was indecisive on how I can effectively communicate my ideas.
In the end I decided that the best way to have my physical model is for my augmented reality model to sit onto of it as if it were really there. 

2. 


Below is my first draft 3ds max model:


3.  The detect ability of buildAR is quite the same in all of my markers (as my markers were  finalised in the previous weeks.)  The video of my test augmented reality in week 3.

4. 

5. The success of my design was through 3ds max and how easy it was to model because I've become familiarized with its functionss and workflow although my problems which took an enormous amount of time to get through (and i'm still jhaving problems with) are the animations and how they dont transfer to buildAR animations such as slice and melt are one of the few. Since those animations give my concept of fluidity and translucent spacial proportions, i'll have to find some other way to convey my concepts... And as mentioned before, buildAR doesnt transfer materials properly, so the majority of my materials which are translucent and glass are not seen which means that my concept doesn't follow through in buildAR as well as I'd like.


Saturday, 11 August 2012

Week 4

After assignment 1 I was instructed to do some slight refining of my concept. I've re-evaluated my two concepts (simplicity + free-flowingness) and created updated concepts.

My first concept Translucent Spacial Proportions derives from simplicity but explains it in a more concentrated phrase.  My concept takes inspiration from SANAA as they achieve simplicity by their utilisation of various transparent/opaque/etheral materials which clearly projects specific uses for each individual space and building. My second concept is Fluidity, I also focus my concept upon conceiving pathways and spaces as one assemblage- although it may seem that there are different elements to the design, the relationship between the spaces are apparent as the design flows from one space to another.

My ideas for my final concept model is described in my drawings below :)


Sketches for final physical object


Sketches for animating my concept model


Sketches for Augmented Reality Installation with a storyboard-like structure.

Thursday, 9 August 2012

Week 3 Independent Study

 Augmented Reality

For now here are my 4 markers created in photoshop- below are my previous markers, and the top banner of this post are the markers I am going to use on BuildAR now, I just have to import my 3ds max model now and see how it all turns out.


The video below is a quick test on how my marker test went. I've imported 3ds max as an .osg file into buildAR- what I've discovered is that 'training' the marker with the camera allows a more fluid movement when moving the marker around.


Thursday, 2 August 2012

Assignment 1 Submission

Whole Submission:

My 'work of art' is called "Free Flowing" because I see that SANAA's work throughout their architectural career has been very refined and when they work with curves, they make it in a way that it is elegant and sleek.


Whole zip submission for assignment 1: http://www.mediafire.com/?2r80e7py2c098hd

Note: please scroll down to the Paper models post which can be found in week 1's post.


In regards to the montage, I chose to represent my concept of simplicity and free-flowing design as an integrated idea on two separate pieces of A3 paper but displayed as one poster :)


The concept of simplicity comes from the effortlessness of SANA's buildings and gives a light-filled environment with the soft tones and basic colour palette of multiple buildings such as the New Museum of Contemporary Art


The free-flowing concept is derived from the curvaceous planes of the Multimedia Centre in Oogaki. Also, the Rolex Learning Centre partially influenced my 3ds max model by taking ideas from its continuous and curved components.


First poster
Second poster


3 RENDERINGS